Hello Bloggers!
I have a few more boxes to share today. I made four more boxes on Tuesday. I have more free time now since I don't have to go to work for a while. Yay! to that. Now you would think it was a lot of boxes for one day. When you duplicate the same item, it didn't take as much time at all. Plus I had all the embellishment already so each box didn't take much time at all. I forgot to take a picture of the purple box before I sold it. So here are 3 of them.
I have two different ways to make this box.
Here is the first one:
1 - 11 x 12 sturdy card stock for box
Note to myself: water color papers are very sturdy their thickness are up to 140 lb perfect for this project.
1 - 7 5/8 x 11 1/8 for lid
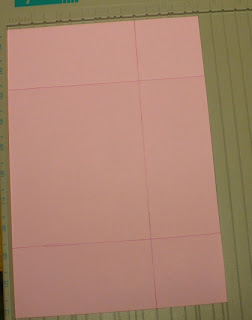
take the 11 x 12 card stock and on the 11 inch size score @ 2 1/2 and 8 1/2
see picture below
turn and score at 4 3/4 and 7 1/4
cut off where I marked with the "X" (1 1/4 x 6 inches) Then fold on all score lines and make 4 cuts where indicated. You can use die cut for that area but it will be difficult when you decorate the box later so that was why I just cut it straight. Assemble the box.
The finished size for this box is 2 1/2" depth x 4 3/4" tall x 6" long.
Here is another way and this was the one that I used. The box came out very sturdy!
2 - 7 1/2 x 11 card stock for box
1 - 7 5/8 x 11 1/8 card stock for lid
take the 7 1/2 x 11 inches card stock and on the 11 inches size score at 2 1/2 & 8 1/2. see picture below
turn and score at 5 inches
make two cut
you should have this
glue and assemble the piece and you should have this. This will be the back of the box. I added the word adhesive here so you know where to put glue when you join the two pieces together. see the 4th picture below
take the other piece and score the same measurement. Except for this piece you will need to make
3 cuts off where I marked with the "x". See diagram picture
you should have this
take this piece and adhere to the other piece. Apply adhesive where indicated and that is the box.
The lid is the same measurement for both boxes.
Take the 7 5/8 x 11 1/8 and score 2 1/2 all around. Then make 4 cuts
Assemble the lid and decorate your box. The finished size for this box is 2 1/2" depth x 5" tall x 6" long. I hope you will give this box a try. The tutorial looked like lots of work but it is a very easy box to make.
Any question let me know.
Have a wonderful weekend!
Helen


