Hello,
I did this tutorial before but the wording were not clear. Therefore, I am redoing the tutorial and hopefully it will be clearer this time.
You will need a crisp new bill. The bank is the best place to get new crisp bills.
Step 1: Starting with the bill face up, fold it in half, lengthwise, crease well, then unfold.
Step 2: Fold the edges to the center, crease well.
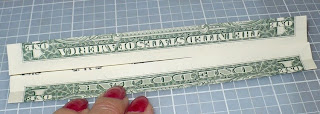 Step 3: Fold in half like shown. Crease well
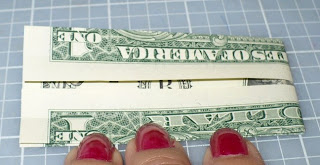 Step 4: This is a two step folds.
Step 4a. Fold the corners in to the center (so it looks like a triangle) crease well and unfold.
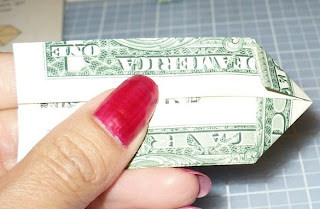 Step 4b. Open the triangles and push in. Repeat the other side.
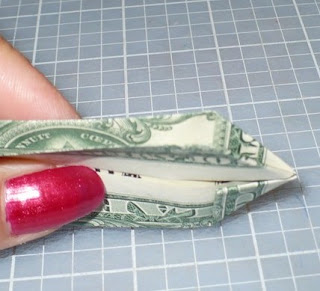 Your bill should look like this. Check to make sure there are two layers: the top layer and the bottom layer.
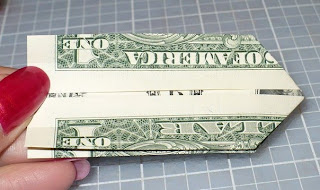 Step 5: Fold the top layer like shown in the picture.
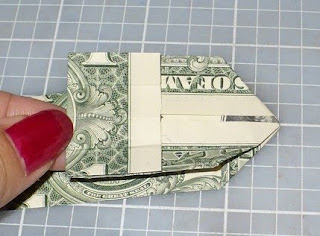 Step 6: still working with the top layer, fold the edges in to the center, crease well.
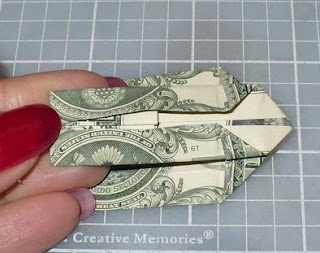 Step 7: Turn the bill over. Repeat step 5 and 6. Except when you fold the top and the bottom edges to the center, over lap the edges (see next picture)
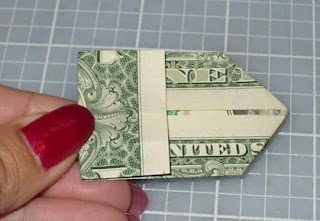 like this (this is to prepare for the last step)
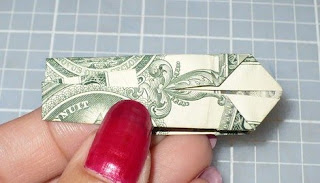 Step 8: Bring the top layer over to the right. You should have a box. Note: if you don't have the box, go back to step 4. Make sure you did step 4 correctly.
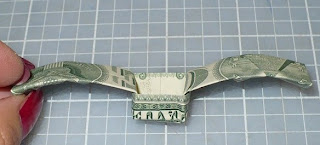 Step 9: Tuck the smaller edge into the bigger edge to form the ring band. See picture.
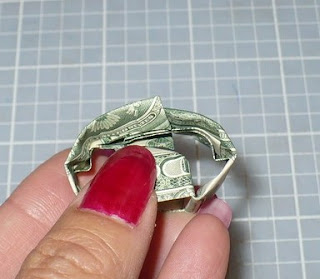 Finish off by place a dime in the box. If the dime doesn't fit, place a glue dot on the box and press the dime in.
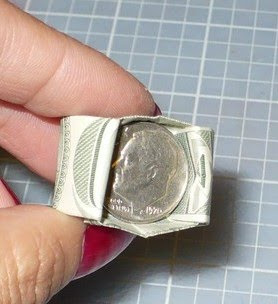 Congratulations! You've just made a dime-n-ring!
If the wording didn't make sense, try looking at the pictures.
Helen
Helen
I did this tutorial before but the wording were not clear. Therefore, I am redoing the tutorial and hopefully it will be clearer this time.
You will need a crisp new bill. The bank is the best place to get new crisp bills.
Step 1: Starting with the bill face up, fold it in half, lengthwise, crease well, then unfold.
Step 2: Fold the edges to the center, crease well.
 Step 3: Fold in half like shown. Crease well
 Step 4: This is a two step folds.
Step 4a. Fold the corners in to the center (so it looks like a triangle) crease well and unfold.
 Step 4b. Open the triangles and push in. Repeat the other side.
 Your bill should look like this. Check to make sure there are two layers: the top layer and the bottom layer.
 Step 5: Fold the top layer like shown in the picture.
 Step 6: still working with the top layer, fold the edges in to the center, crease well.
 Step 7: Turn the bill over. Repeat step 5 and 6. Except when you fold the top and the bottom edges to the center, over lap the edges (see next picture)
 like this (this is to prepare for the last step)
 Step 8: Bring the top layer over to the right. You should have a box. Note: if you don't have the box, go back to step 4. Make sure you did step 4 correctly.
 Step 9: Tuck the smaller edge into the bigger edge to form the ring band. See picture.
 Finish off by place a dime in the box. If the dime doesn't fit, place a glue dot on the box and press the dime in.
  Congratulations! You've just made a dime-n-ring!
If the wording didn't make sense, try looking at the pictures.
Helen
Helen

5 comments:
Hi Helen!
This is great - I am going to have to make one for Jim! I love all of your beautiful flowers and projects that you have made since I was last here! So wonderful! Wishing you a happy day!
Hugs,
Barbara Diane
Hi Helen
This is brilliant!! So clever!!
I have featured your tutorial on my Pink Paper Paradise facebook page.
Michelle :o)
Cute! :)
This is a very clever idea you found. Thanks for putting the directions in English.
This is a very clever idea you found. Thanks for putting the directions in English.
Post a Comment